Purpose
Many seeds have a protective gel sack that surrounds them. In nature, these gel sacks would be removed after the seed is eaten or during the fermentation process if the fruit falls off the plant and rots. For our purposes, we’ll utilize natural fermentation to remove the gel sack from our seeds so that they will be able to germinate in the next season.
Gel Sack Seeds
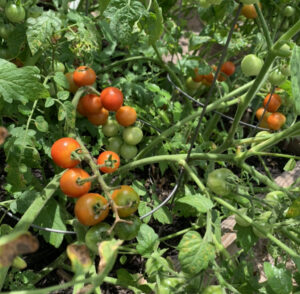
There are numerous plants that grow seeds with gels sacks, among these plants commonly including tomatoes and cucumbers. While these seeds may germinate straight out of the fruit, if you plan to store the seeds, it’s best to remove the gel sack before storage and it also improves germination rate.
Process
- Remove seeds from fruit. For tomatoes and cucumbers alike, the seeds are found inside the fruit and are often clustered around the center of the fruit. A spoon can be used to scrape the seeds out along with the other fruit particles and goop that come along with them. Essentially, you’re wanting to remove the skin and as much of the fruit matter as you can while allowing the tomato liquids to ferment with the seeds.
- Place these seeds in a jar or glass and fill with roughly 1 cup of water per 1/2 cup of seeds. You want enough water to really dilute the seeds, but you don’t want too much water as to inhibit the fermentation process.
- Simply leave the jars of seeds out, uncovered, for 5-14 days. As the seeds ferment, mold will grow over the top; this mold can be left or removed by skimming the top of the water line with a fork or spoon. You can stir the seeds every couple of days after skimming off the top layer of mold.
- Once the seeds have fermented, drain the water and rinse well. It’s generally best to use some kind of sifting device to help remove any remaining fruit matter that may be mixed in with the seeds. Using a wire mesh sieve spoon can also help finish rubbing the gel sack off of the seed.
- Allow the seeds to dry on a ceramic, glass, or porcelain dish so that the seed doesn’t stick like it will to paper. Move the seeds around over the course of the next week to allow the seeds to dry properly. Once dried, the seeds can be stored and used for up to about two years.
Tips
- The seeds that float will mix in the mold, this is okay because they are no good anyway. The good seeds will stay sank to the bottom of the water.
- Don’t let the seeds soak in the water for too long. Any longer than 14 days (and sometimes even before) the seeds will begin to germinate in the jar of water and you’ll end up with a bunch of tomato sprouts.


One reply on “How to Ferment and Collect Gel Seeds”
Excellent article! We are linking to this particularly great post on our site. Keep up the great writing. Carolin Orren Vyky