


Due to the high temperatures of this method, it is typically ideal for cooked foods that can cook a little more such as jams, canned tomatoes, stewed tomatoes and other stewed vegetables, etc. This is not always the best method for canning fresh fruits and vegetables such as pickles (pickling cucumbers), pickled okra, beans, and other foods that you would prefer to stay crispy.
1. Sterilize your equipment
There are two methods for sterilizing canning supplies. The more traditional, but tried and true method is using a water bath in a deep pot of boiling water. The second method is using plain soap and water to scrub and clean the jar, lids, and rings. The choice is ultimately yours, both are widely used and both are acceptable methods.
Sterilizing the Jars and Rings
We usually start by cleaning our jars and rings with soap and water then follow up with a water bath. We can foods we forage or grow in the garden and we also ferment foods, so we want to make sure everything is very clean, every step of the way.
While most of the creases and unsmooth spots are outside the jar and on the ring, which is outside the jar, the water bath can more throughly reach every crevice of the jar and ring. However, the water bath method isn’t great for removing caked on grime for used jars nor for removing glue or stickers from labeling and some people comment that the water bath wastes energy but you’ll have to boil a big pot of water for this canning method regardless. Again, neither choice is wrong and it’s ultimately what works best for you – we’ve certainly used jars straight from the dishwater while still a bit steamy on the drying cycle.
Sterilizing the Lids
Traditionally, this method was required, but for a dual purpose in preparing the lids for canning. Old canning lids needed to be boiled so that the rubber would soften and be able to mold to the glass jar and seal properly. Since the 1970s, a different type of rubber has been used on the lid to seal jars and it no longer needs to be softened by hot water. In fact, some people comment that boiling the new style lids can cause the rubber to crack and potentially create space for bacteria growth or improper sealing.
Method 1: Water Bath Sterilization
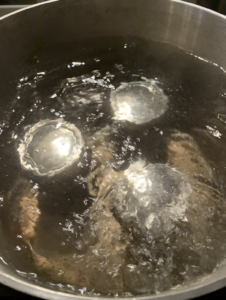
To sterilize your jars by water bath, the jars should start in the pot when the water is cold; if not, the glass may shatter when dipped into the boiling or hot water. If the water is already boiling, place the jars on a towel or trivet on the countertop then slowly add boiling water from the pot into the jars. One cup of hot water at a time and fill the jar over the course of about 2-3 minutes and the jars should heat up slowly and warm enough to not shatter from temperature shock when placed in the water bath.
A 10 minute boiling period allows most everything to boil off of the glass and kill any bacteria, viruses, mold, etc. that may be on the jar. The jars need to be completely covered by water to ensure the glass is fully sterilized. Note: The jars will need to be covered by 1-2 inches of water once they are filled so make sure you have a deep enough pot.
It’s also recommended to use some kind of boiling rack to raise the jars off the bottom of the pan. This is supposed to help prevent the jars from breaking from rattling around while boiling. Any metal or heat resistant cooking rack or strainer can be used. I may have good luck, but I don’t always use a boiling rack and haven’t had issues yet; I’ll be sure to come back and edit and blog about it if this changes.
Method 2: Soap and Water Sterilization
The second method is traditional soap and water scrubbing and soaking. Use a clean sponge or rag to fully clean the inside and outside of the jar, ring, and lid. Spend about three minute washing each jar set and allow the soap to soak and cover the jars fully during this time period. This helps ensure the soap has the chance to kill and remove dirt, bacteria, virus, mildew, etc.
2. Fill the jars with food
Not just any food of course. For food to be safe for canning, it still requires either natural or artificial preservatives to help keep the food from spoiling inside the can. Many recipes rely on high acidity, usually from adding lemon juice, to create an environment inside the jar that is undesirable for bacteria growth and keeps the food fresh for about a year. Make sure you have the right recipe or do some research before canning just any food. Many recipes recommend a canning method and it’s important to keep in mind that there are other canning methods aside from boiling water bath canning.
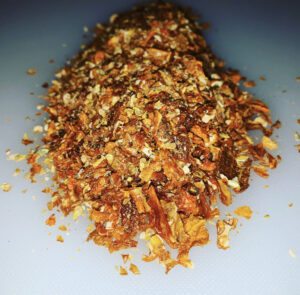
Make sure you don’t use food that has already spoiled or shows signs of any mold or mildew growth. Canning food that’s already bad can cause you to get dreadfully ill, if eaten. Ideally, the food going inside would be fresh berry jam, whole tomatoes, or something that can be canned immediately after being processed.
If you can’t immediately process the food, for instance jam, and you need to refrigerate it, consider warming the jam back up before canning it. Heating the jam back up to a working temperature allows the jam to flow more freely, making it easier to transfer of the jam into the jar. In addition, the jar for canning may be hot from sterilization and the jar will need to be hot before being placed in boiling water. Any contact with a hot jar to cold liquids – or a cold jar to hot liquids – can cause the glass to fracture, crack, and shatter due to heat stress.
3. Place lid and ring on jar
Check that there are no cuts or cracks in the rubber on the lid and make sure that the lid is on the jar properly before adding the ring. When screwing on the ring, it’s important to get it about finger-tip-tight to make sure the lid stays on, but isn’t so tight that air cannot escape the lid at the beginning of the sealing process.
4. Process jars in boiling water for 10 minutes
The jars will be going into boiling water, so the content of the jar will need to be hot and not cold to prevent the glass from breaking from temperature shock – for the same reasons as discussed above in water bath sterilization. Consider warming the food going into the jar before putting it into the jar, especially if the food is coming straight out of the refrigerator. Not only will the jars be processed in boiling water, but they may be hot from a sterilizing water bath, so things will be and need to be quite warm.
You will also need to ensure there’s between 1-2 inches of water over the top of the lids of the jars. You need enough water coverage to keep a constant seal of water over the jar, even while boiling. If there’s not enough water in the pot, then the jars may not seal properly. Similar to the sterilization step above, it’s also recommended to use a boiling rack to raise the jars off the bottom of the pan and prevent them breaking while boiling.
Once the jars are safely in water, allow them to process for the time recommenced at your altitude. Here in Houston, Texas, we’re nearly at sea level so we process our cans for about 10 minutes. You can check the chart below to see how much time you should add to the 10 minute starting point for people living at 0-1,000 feet above sea level. Sufficient boiling time ensures there’s been enough air forced out of the jar to create a vacuum seal with the lid.
| Feet Above Sea Level | Increase in Processing Time |
| 1,001-3,000 | 5 minutes |
| 3,001-6,000 | 10 minutes |
| 6,001-8,000 | 15 minutes |
| 8,001-10,000 | 20 minutes |
5. Rest jars for 24 hours
Once the jars have boiled for their recommenced processing times, it’s time to remove the jars from the pot. Place the jars in a clean area on a towel or trivet on the countertop. Leave the jars undisturbed for 24 hours as they settle to room temperature and the seal settles. After 24 hours, the ring can be removed from the jar and the lid can be checked for a proper seal.
6. Store jars for up to one year without ring on
It’s recommended to store the jars with the ring off. This allows the lid to clearly show whether it has maintained a proper seal and should indicate whether the food is still safe to consume. If the lid gets bumped, knocked, or didn’t seal properly in the first place, it can eventually come loose and without the ring, the lid is more likely for the lid to fall off, open too easily upon use, or for the jar of food to show obvious signs of bacteria upon opening – this is a good thing for your health.
It may not be the best idea to stack the jars, especially more than two high, to prevent damage from occurring to the seal. When processed and stored properly, canned food can offer a shelf life of about one year.


One reply on “High Temperature Water Bath Canning”
I loved your article. Much thanks again. Keep writing. Cassandry Ingrim Krenn